Users and Roles
Users
Beaver IoT supports to add and manage sub-accounts by super admin account.
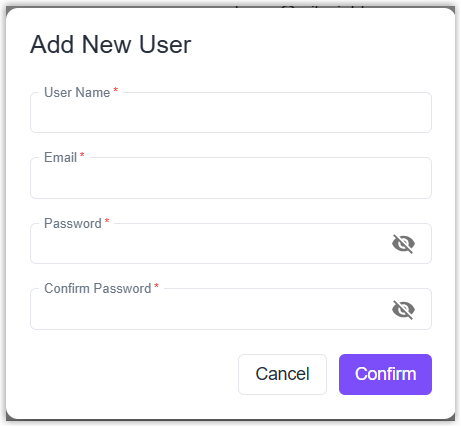
Add User
-
Go to Users and Roles > Users page, click Add to add a new user.
-
Fill in the username, email and password of this user.
-
Click Confirm to save the settings.
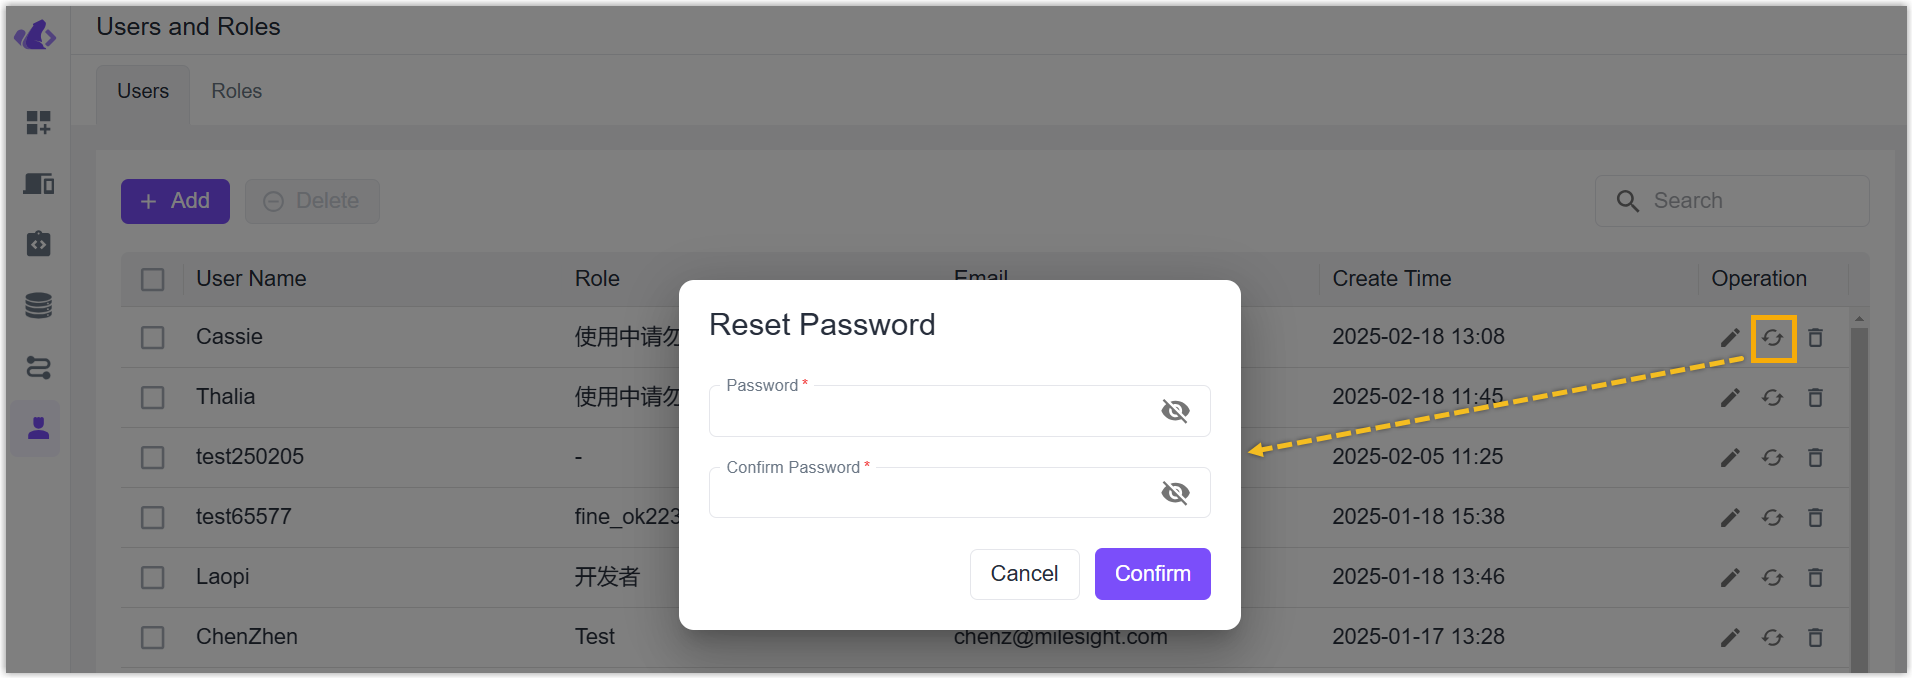
Edit User
- Click Edit icon of desired user to modify the username and email address.

- Click Reset Password icon of desired user to reset the password.
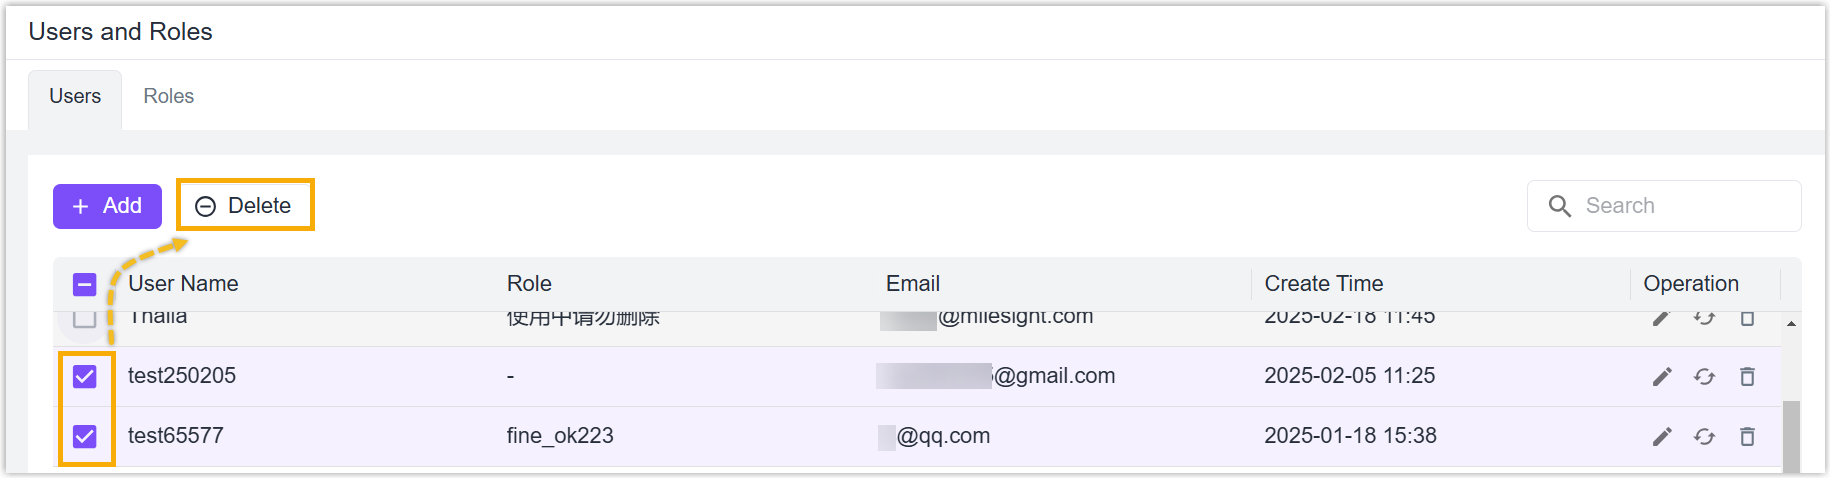
Delete User
Delete one user: Click Delete icon of desired user to delete this user.
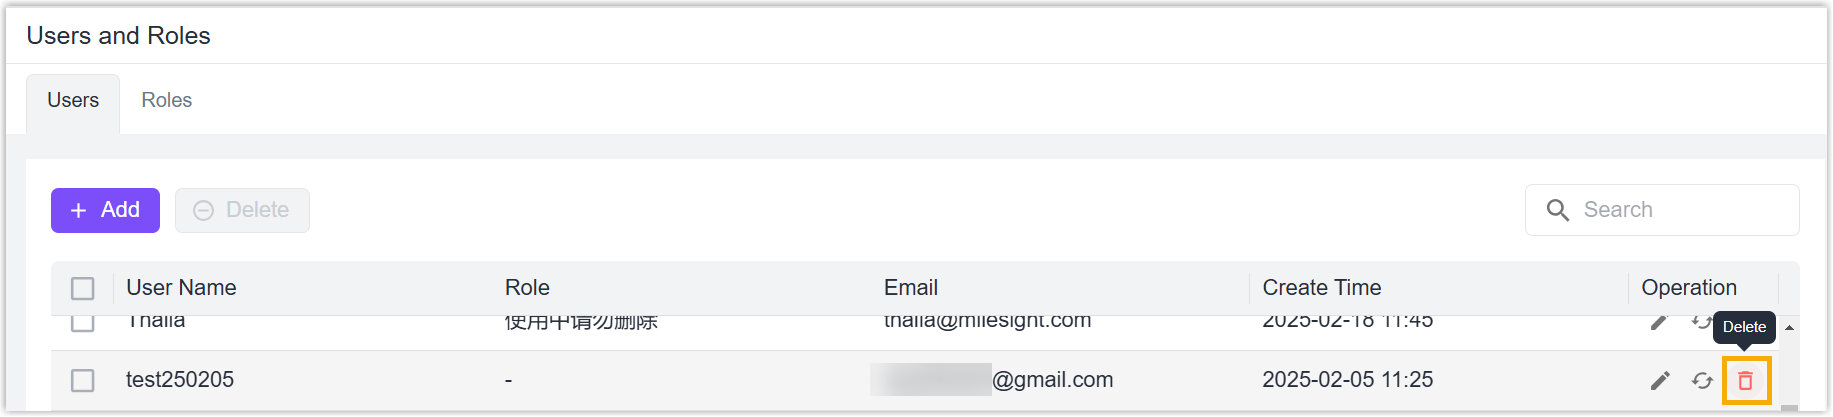
Delete users in bulk: check the boxes of desired users, click Delete button on the top to delete these users.
Roles
Beaver IoT supports to create roles to assign the different resource permissions to different sub-accounts.
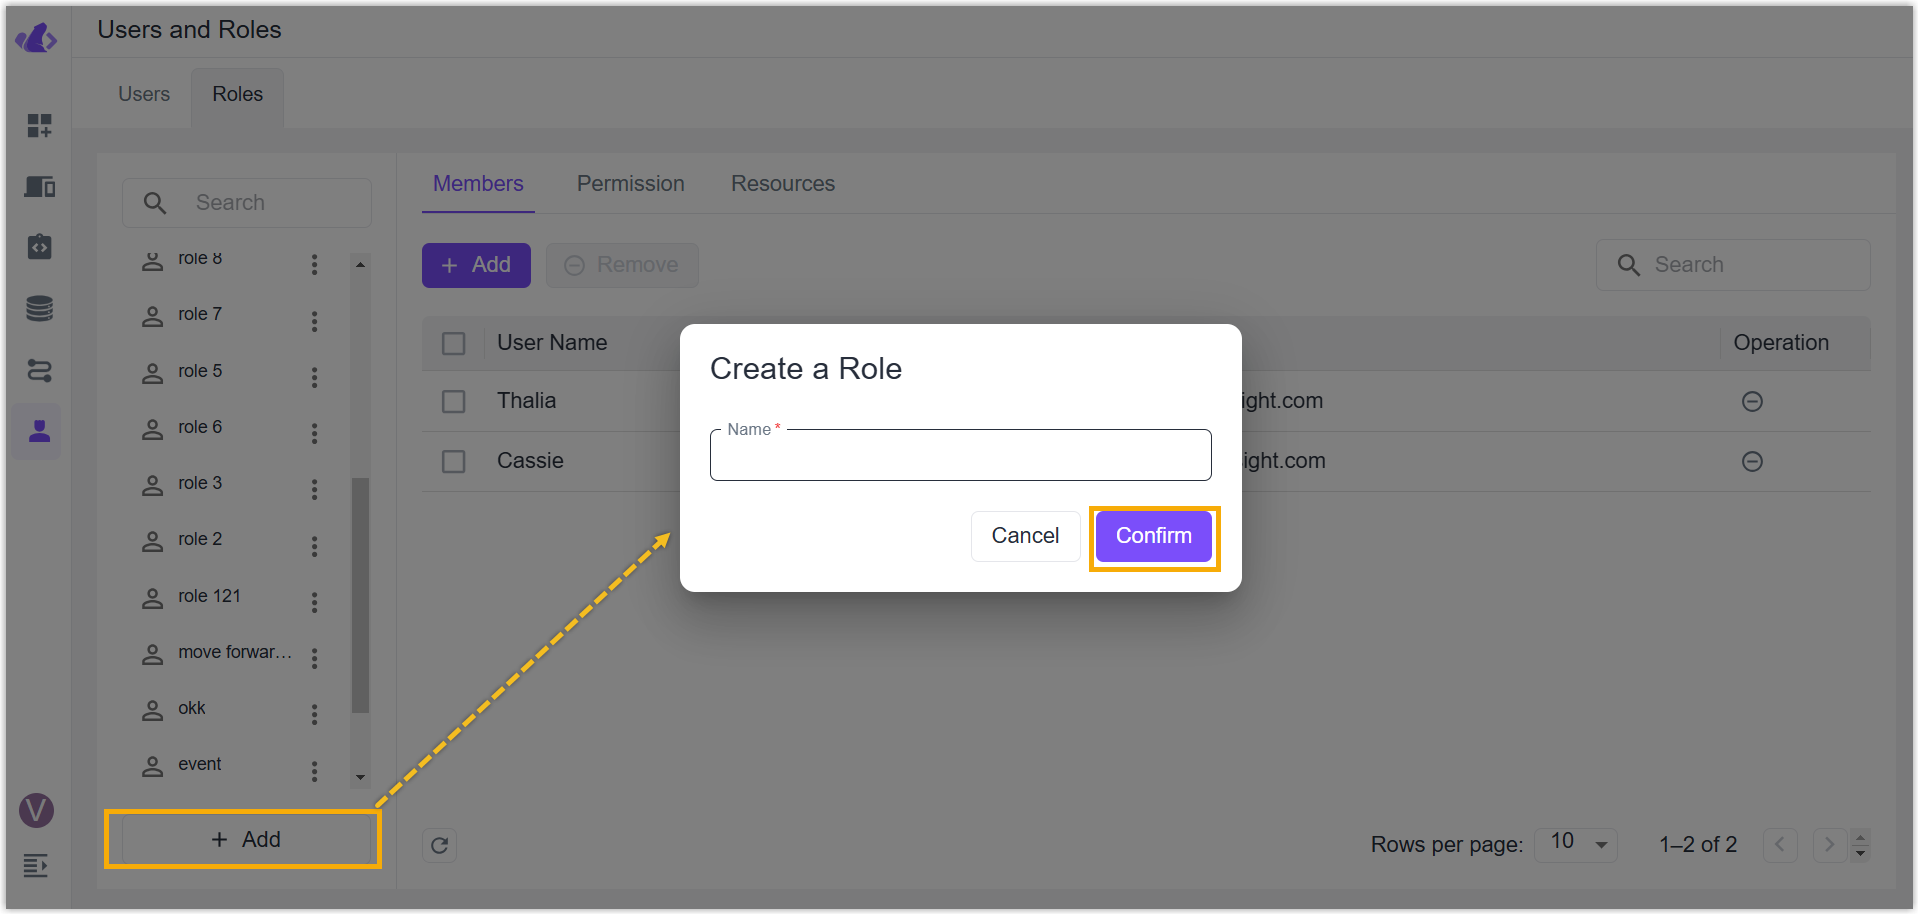
Add Role
- Go to Users and Roles > Roles page, click Add to create a new role.
- Customize a role name, click Confirm to save the setting.
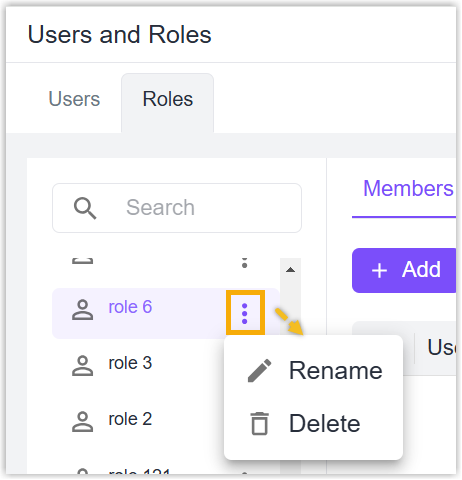
Rename or Delete Role
Select the desired role in the left role list, click below icon to select Rename to modify the role name, or select Delete to delete this role.
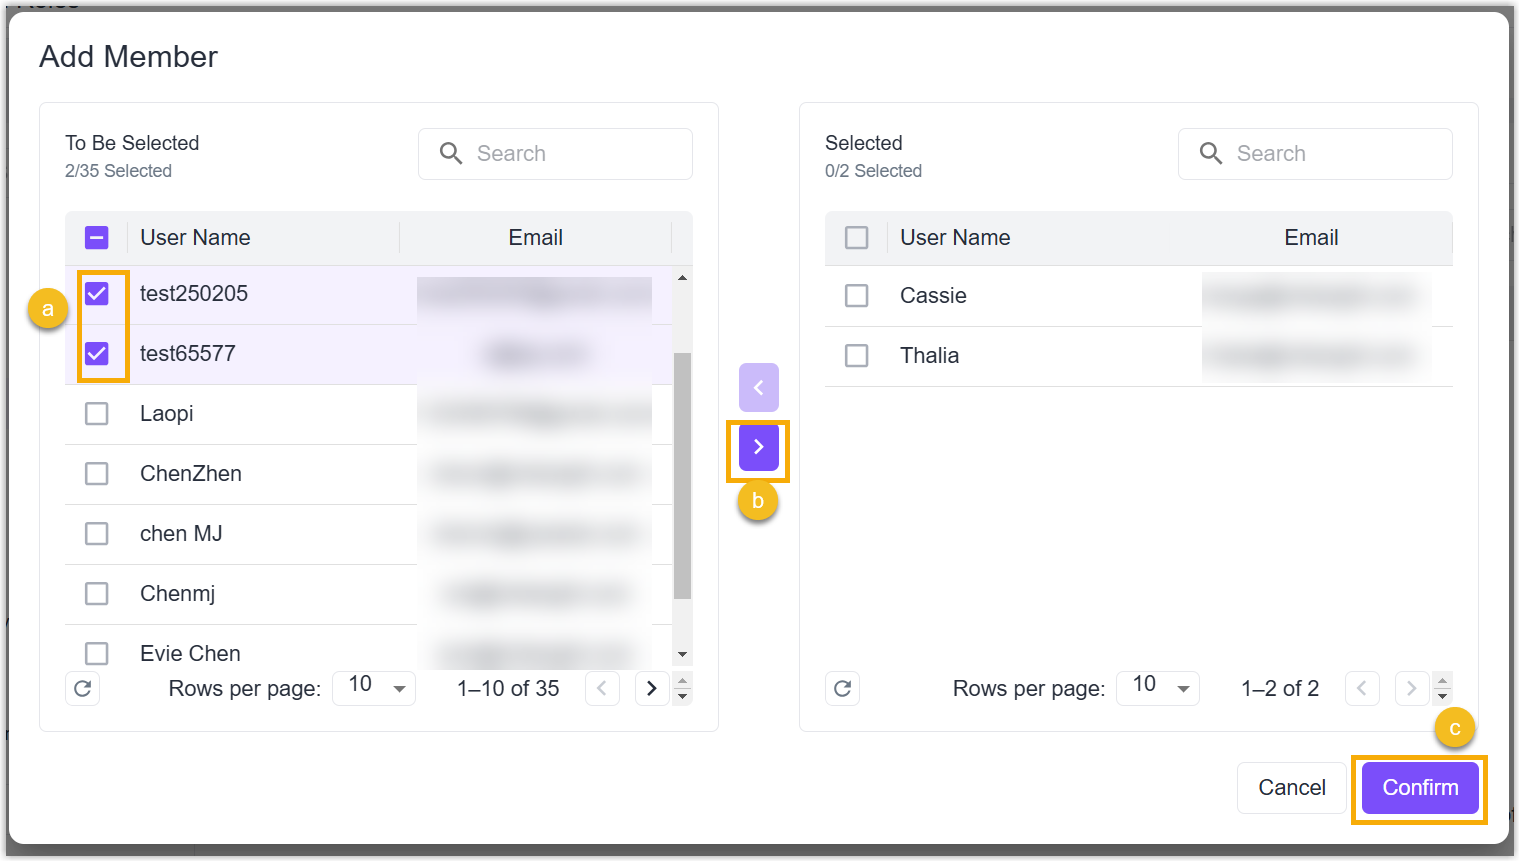
Add Members to Role
- Select the desired role in the left role list, go to Members page and click Add to add users.
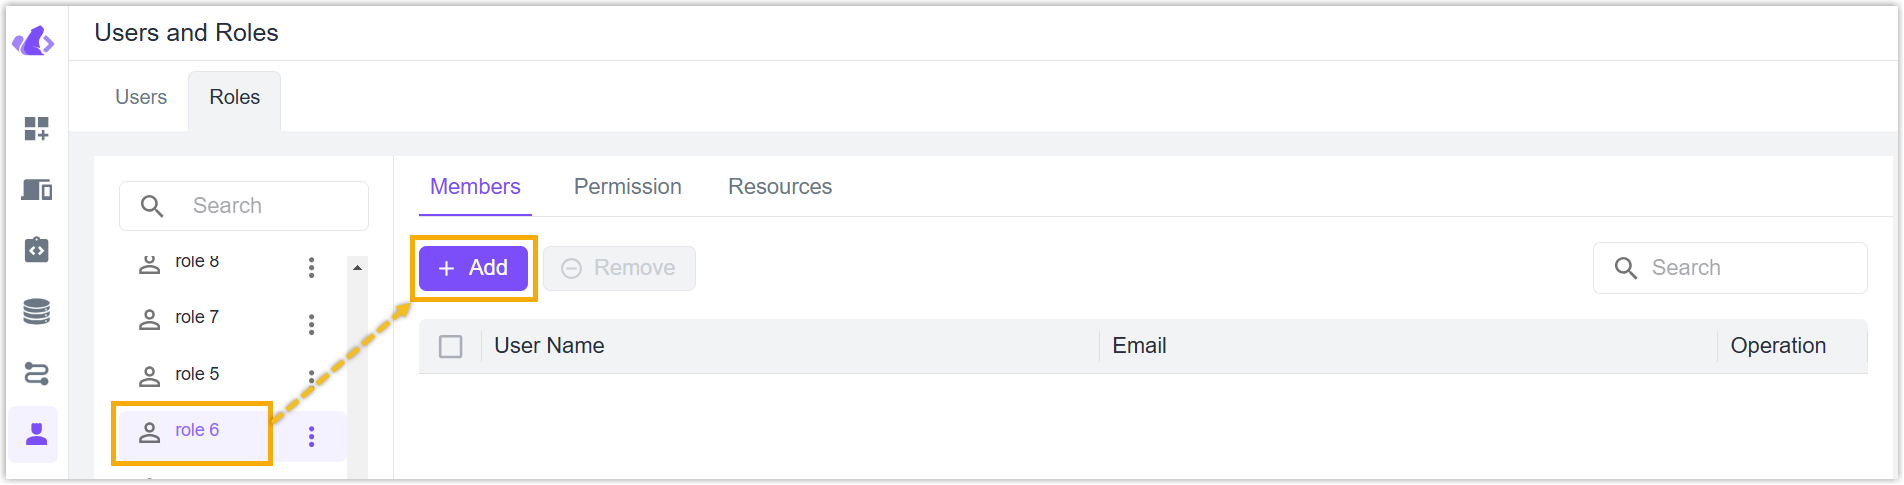
- Check the boxes of users on the left list and add to the right list, click Confirm to save the settings.
Remove Members from Role
Remove one member: Click Remove icon of desired user to remove this user from this role.
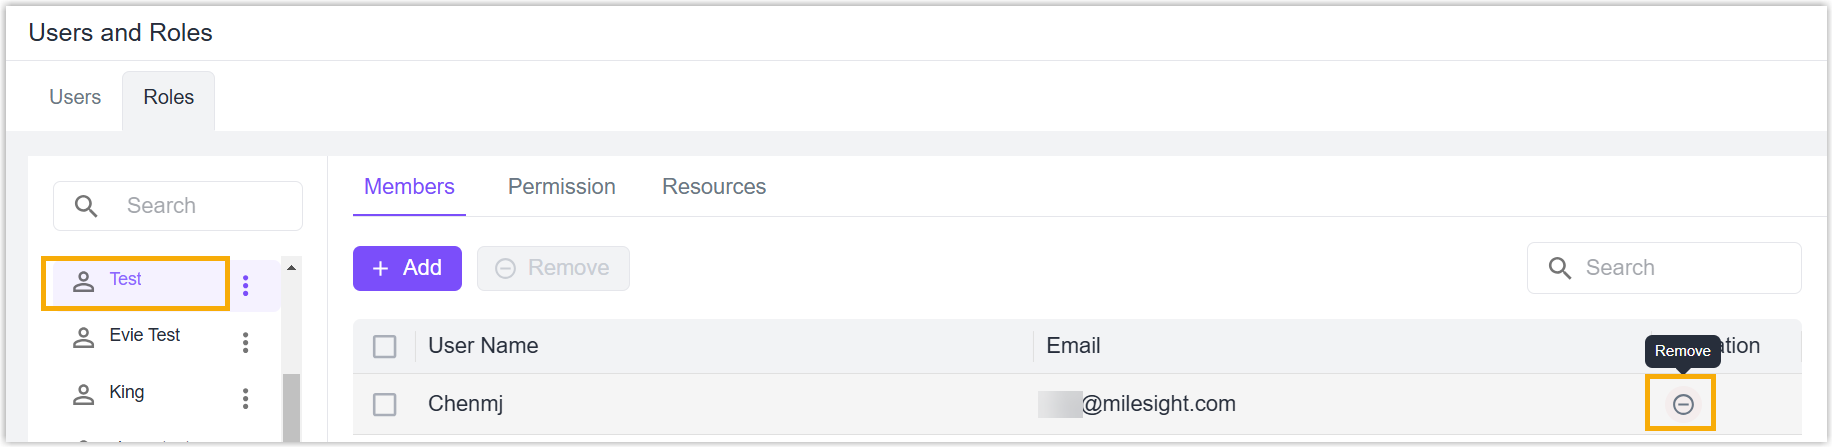
Remove members in bulk: check the boxes of desired users, click Remove button on the top to remove these users from this role.

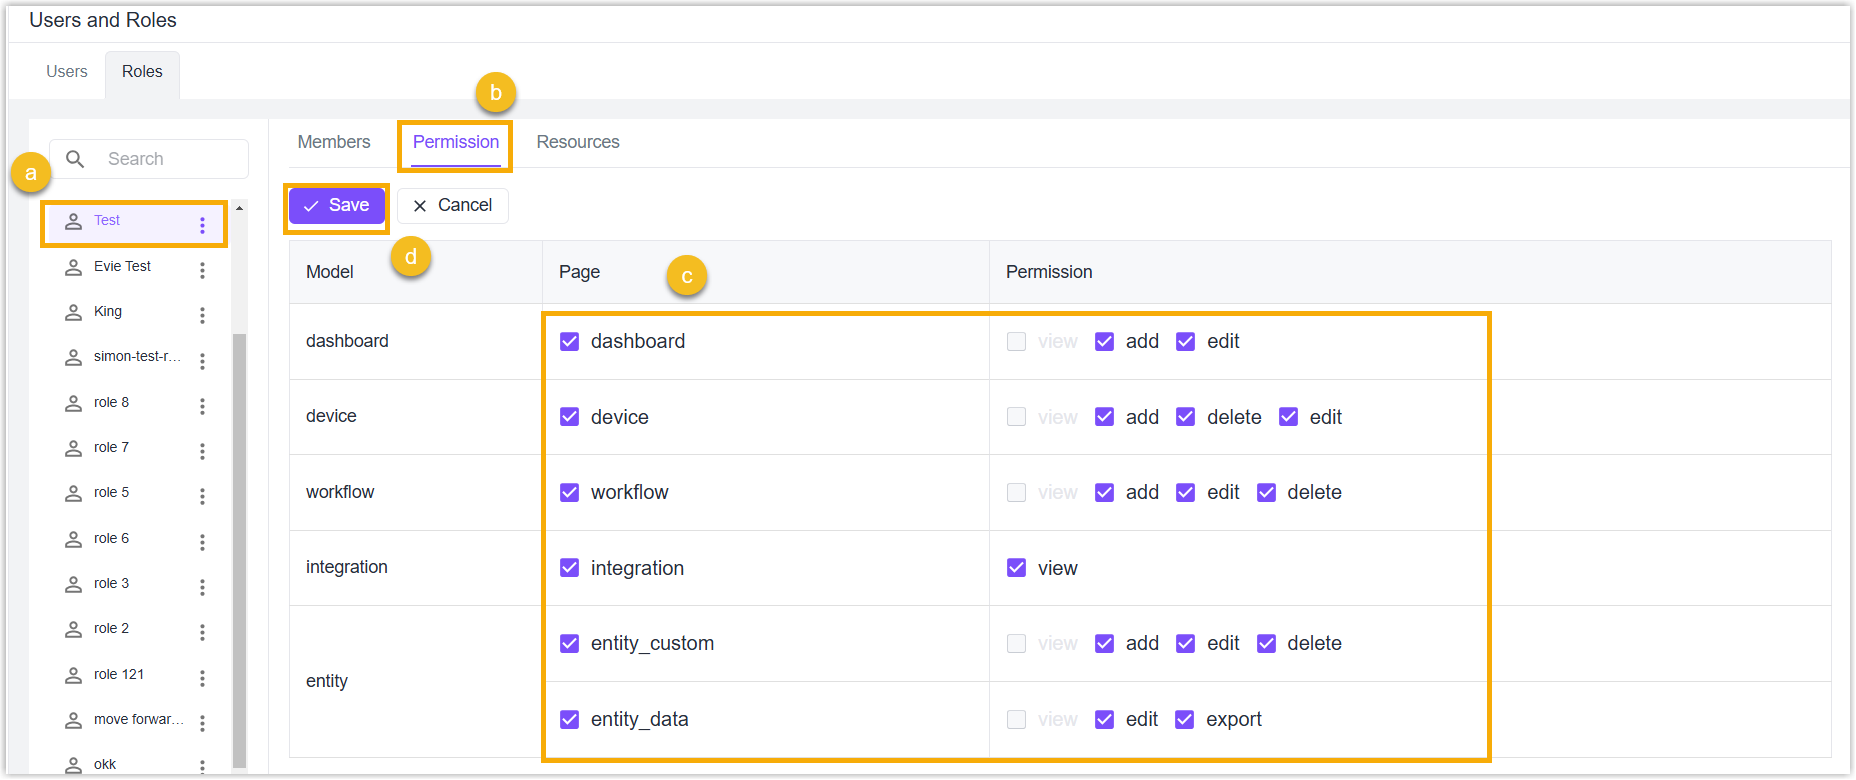
Edit Page Permission
Beaver IoT supports managing the visible pages, and available functions of every page the member users use under this role.
-
Select the desired role in the left role list, go to Permission page and click Edit to edit the page permissions.
-
Check or uncheck all the permissions of the models in the Page list, or check or uncheck the parts of permissions of the models in the Permission list.
-
Click Save to save the settings. You can check the results by login the users under this role.
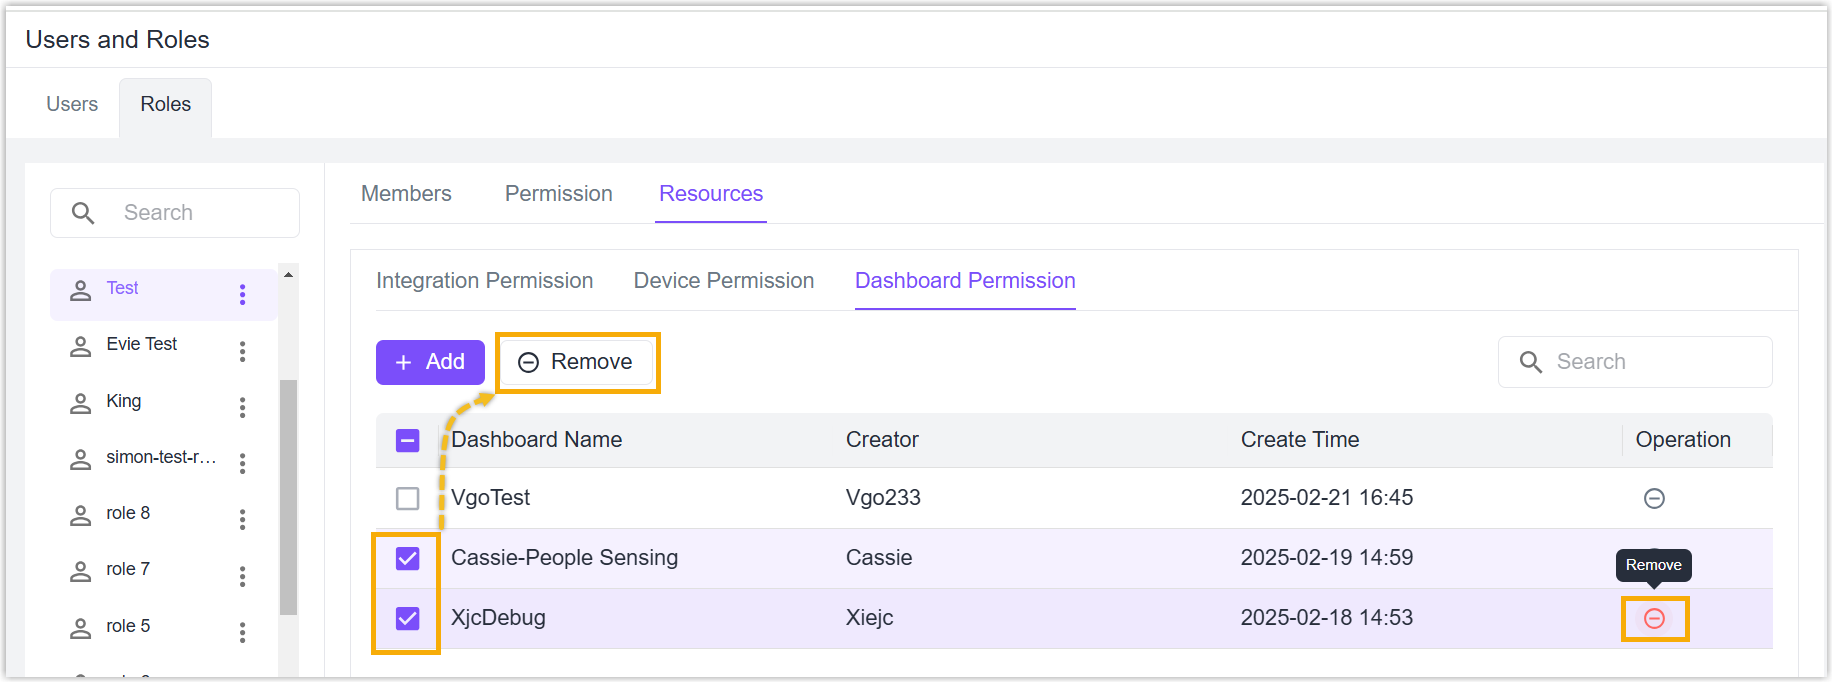
Edit Resource Permission
Beaver IoT supports managing the visible and useable resources of every page the member users use under this role.
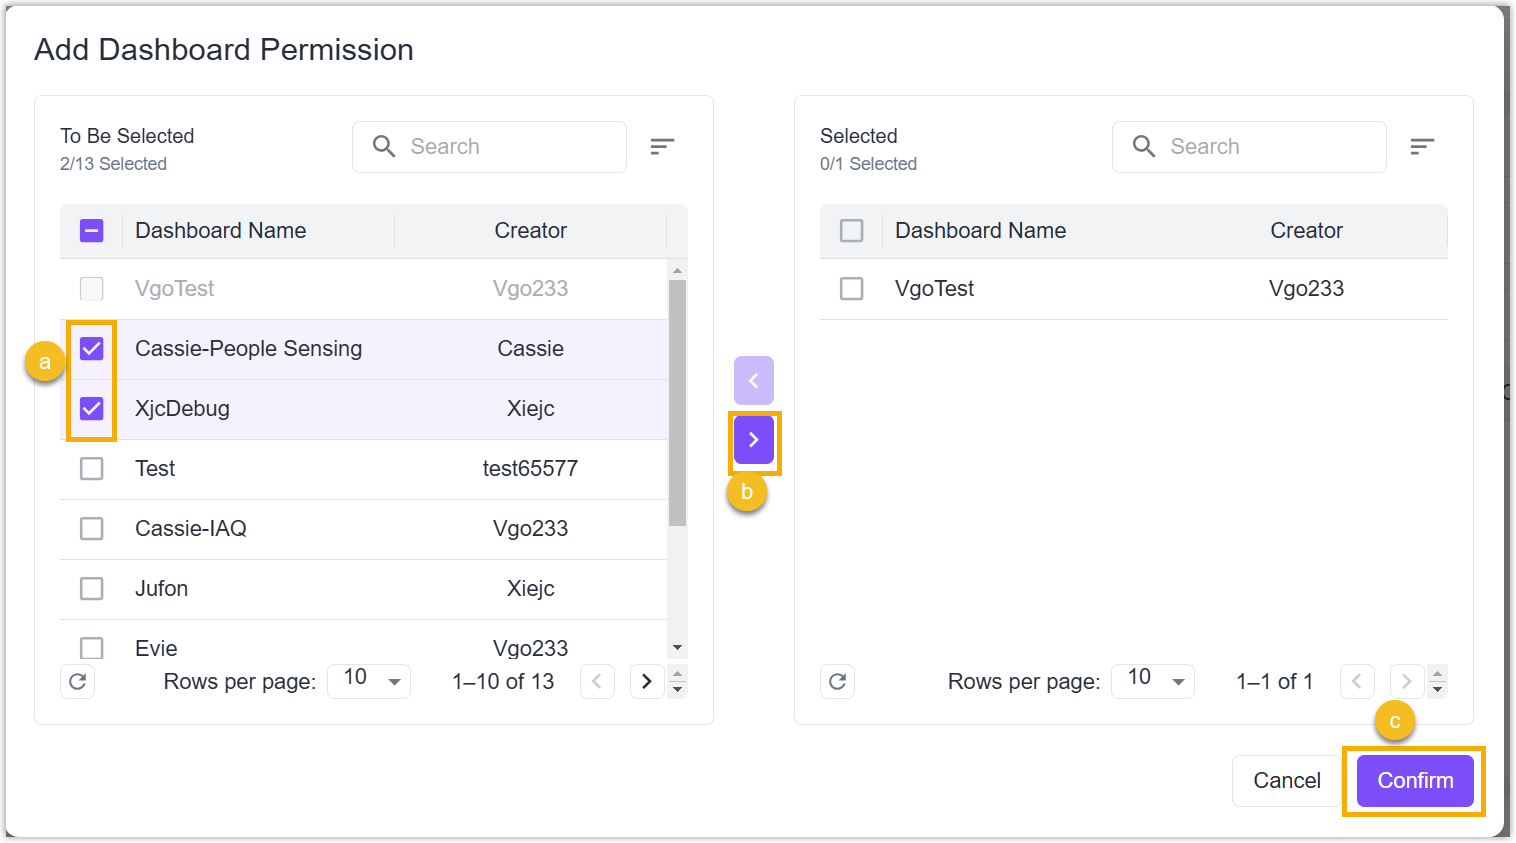
- Select the desired role in the left role list, go to Resources page to select the corresponding resources pages, and click Add to add the permissions.
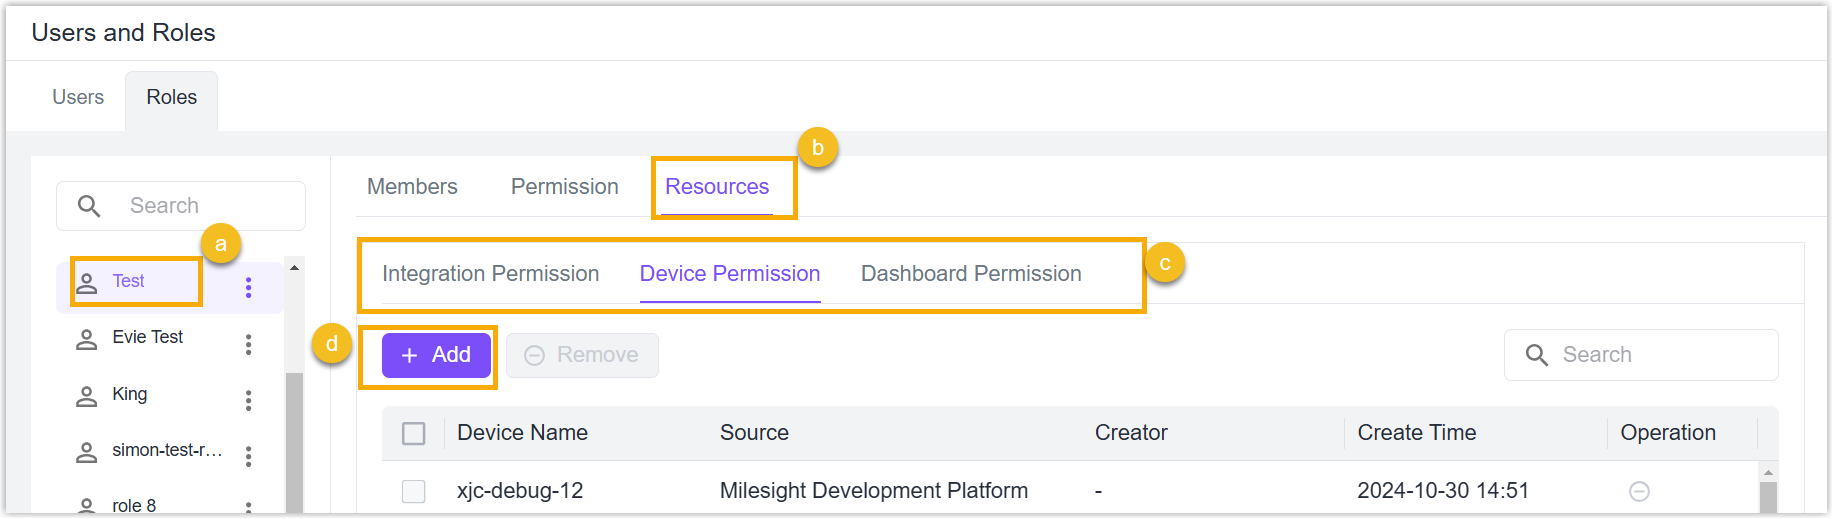
- Check the boxes of resources on the left list and add to the right list, click Confirm to save the settings.
- When adding an integration permission to this role, the devices under this integration will be added to Device Permission page automatically, and corresponding entity data will display on the Entity > Entity Data page of the member accounts.
-
Click Remove icon of desired resource or check the boxes of desired resources and click Remove button on the top to remove the resources from this role.
note- If a device permission is added automatically when adding an integration permission, this device permission can be not removed separately. It is necessary to remove the whole integration permission.